

Overview
On Call of Duty: Black Ops 6, I worked as one of the first 3 zombies designers on the game and developed the game from the first zombie’s map concept to shipping the last season of Black Ops 6 zombie content.
While developing Black Ops 6 zombies, I worked as a designer with many hats but mainly focusing in Quest and Narrative Design. I also worked to bring designs to life from concept to live service utilizing our in-house tools!
I had a load of fun working with my fellow devs and I’m grateful I was able to have a hand in every zombies map in Black Ops 6.
The sections below provide more information about my specific contributions - enjoy!
-
Bank Vault unlock Quest
Pack-a-Punch Quest
Main Quest
The Tomb
Pack-a-Punch Quest
Wonder Weapon Quest
Main Quest
Jump Scare Easter Egg
Citadelle des Morts
Maya Side Quest
Wonder Weapon Quest
Branching Wonder Weapon Upgrade Quests
Gold Trash Can Easter Egg
-
Trap System Messaging
Bank Vault & Terminus Armory
Spawning Setup (Liberty Falls)
Door-buy Setup (Liberty Falls)
Economy Tuning (Liberty Falls)
-
Zone barricade setup
Aetherella Trap
MQ sequence ending
Facility’s power setup
Maya & Nathan’s story
Main Quest beats and ending
Citadelle des Morts
Maya Side Quest (wrapping up her side plot line)
Tomb
Power/Aether Energy setup
Wonder Weapon Quest features and Sir Archibald’s Tale
Main Quest trials and ending
Jumpscare Side Quest background
Wonder Weapon Quest features
The Forsaken’s End
Blanchard’s Branching Story
Dr. Panos’s Branching Story
-
Spawning system
Door-buy system
Aetherella Trap
Propped up trap system functionality
Implemented VO
The Tomb
Wonder Weapon Quest
Unique AI spawning locations and behavior
Monocle dorpping functionality (including adding additional systemic updates to account for map-unique navmesh properties - shout out Gary Machlis for helping with that!)
Puzzle symbol logic (including unique material application and functionality - shoutout Mike Stewart!)
Original pathfinding functionality for energy orb moving to randomized portal locations during combat sequences)
Custom animations for enemies spawning out of the floor-portals
Original energy-flowing material logic for final combat encounter
Wonder Weapon respawn functionality
Save/Load functionality for Power Quest, Wonder Weapon Quest, and Aether Lantern feature
Original area-limited Combat Sequences with accompanied spawning that were not lock-downs
Specialized spawning, zones and door-buys
Force evolution logic for multiple AI types to allow quest designers the ability to update AI evolution states
Wonder Weapon Quest
Periodic Table Cipher Puzzle
AI behavior, animations and deaths when fed to the Cyst
Area-based quest progression for draining the Aetheric Flora
Timer and interaction combination for electrical power surge sequence
Spawning and area tracking of AI for transferrence sequence
Triggerable Vo from NPC characters with unqiue criteria
Player Character VO and Banter
Forsaken Mini-Boss Fight
Custom enemy spawning waves
Forsaken Enemy VO
Custom enemy death
Interactable energy ball that upgrades the Wonder Weapon
Klaus Bot Origin Tracking Logic (So we could keep track of which Uber Klaus the Bot spawned from)
Save/Load logic for entire Wonder Weapon Quest and portions of Wonder Weapon Upgrade Quests
Original UI Functionality for numerous quest steps
All Wonder Weapon Respawn Functionality (including tracking if the weapon originated from the quest and if the quest version was an upgraded variant and respawning appropriately)
Fast Travel Shut-down and Restart Sequence (Wonder Weapon Upgrade Quest)
Adjusting specific fast travel instances for quest purposes
Spawning location and logic for encounter-specific zombies (including custom attractor logic)
Overriding AI type logic to create a friendly Klaus Bot that can be damaged by other AI
Parachuting down elevator shaft logic and gameplay
-
Aetherella Trap
Dark Aether Field Generator Trap
Bank Vault and Key Dropping
-
Pack-a-Punch quest defend sequences
Nathan’s Mini-Boss Battle
Main Quest combat encounters
Citadelle des Morts
Maya Side Quest Vermin Hallway
Maya Side Quest Doppelghast Showdown
Tomb
Wonder Weapon Quest constellation combat
Wonder Weapon Quest final defend
Main Quest Evolution Trials
Shattered Veil
Assisted in designing the Elder Disciple AI Enemy
Reckoning
Designed the HVT Uber Klaus AI Enemy
The Forsaken’s Mini Boss Fight
Wonder Weapon Quest combat sequences
Blanchard Wonder Weapon Quest Combat Sequences
Panos Wonder Weapon Upgrade Quest Combat Sequences
-
Map spawning setup
Map door-buy/zone creation setup
Citadelle des Morts
Maya Side Quest Vermin Hallway
Maya Side Quest Doppelghast chamber
Maya Side Quest ending area
The Tomb
Custom spawning setup
Feature Placement
Combat sequence and trial location setup
Reckoning
BioWeapons Lab setup
Aetheric Flora placement and radius adjustment for Wonder Weapon Quest
Set-up unique fast travel functionality and zone connection for the Elevator Shaft portion of a quest
Added original electricity paths and consoles for the Forsaken fight transfer sequence - including unique spawning for the fight
Wonder Weapon and Wonder Weapon Upgrade Quest feature placements
-
Liberty Falls
Aetherella Trap Audio Implementation (various status states and VO)
Tomb
Pack a Punch Quest VO Implementation
Player Characters
Sir Archibald (NPC)
Wonder Weapon Quest Implementation
Constellation puzzle sound effects (various states for the individual symbols and overall puzzle)
Archibald’s Monocle idle FX
Constellation puzzle combat sequence initiation (puzzle transforming into an orb and shooting around the form portals)
Constellation puzzle combat sequence FX (orbs spawning zombies, aether lanterns being triggered by completing a portal)
Final combat sequence initiation (WW parts combining for form the WW, portals starting up, Archibald VO)
Final combat sequence FX (portals, arcs of light shooting out to spawn zombies, WW taking damage, Energy being progressed and portals closing)
Final combat sequence ending FX (portals closing, energy transferring into WW, WW spawning, Archibald VO, Player character VO)
Reckoning
Wonder Weapon Quest Implementation
Periodic Table Puzzle Screen FX
Player Characters VO
Blanchard (NPC) VO
Dr. Panos (NPC) VO
The Cyst FX
Zombies Being Eaten FX
Aetheric Flora being drained FX
Gas Pools from Aetheric Flora FX
Electricity Console and Wire Flow FX
The Forsaken Mini-Boss Fight
The Forsaken Transferrence Sequence FX
The Forsaken (Enemy AI) VO and Death FX
The Forsaken Life Orb FX
The Cyst Transformation FX
Key Learnings
-
Finding a good balance between original ideas and scope considerations is hard - especially when you’re super passionate about an idea’s potential. Incredible designs are great but what’s even greater is getting good designs and content into the hands of our players!
-
My technical abilities improved drastically throughout this project. I came into development and learned in-house tools and scripting language in a trial-by-fire method. Not only did I end up tripling my implementation time from my first script to my last script (as well as my script being much more polished), but I also added functionality into our engine alongside engineers to streamline our tools!
-
Understanding who you are creating content for is integral in design - however, a learning I have taken from this project is that this philosophy applies internally as much as externally. Knowing when to present an idea, how to present a design pitch and when to show content for feedback
-
It’s very easy to get carried away while in the scripting zone. Learning to work on one small component at a time and ensuring the foundations all work before creating more complex functionality was something that proved to be very beneficial, especially in the AAA environment where requests and designs are consistently changing. Implementing in this method allowed for easier flexibility, faster iteration time as well as earlier playtesting time for different aspects of a design.
WARNING:
THE BELOW SECTIONS CAN BE QUITE DETAILED (wordy).
PROCEED AT YOUR OWN RISK
Jump to a map:
Launch Map: Liberty Falls
System Design
Economy Tuning
Scripting
Quest Design
Feature Design
Skillsets Applied:
Overview
During the development of Liberty Falls I…
Designed two unique map features, designed the systemic language of the traps in Black Ops 6, and implemented the Aetherella trap.
Designed the Bank Vault system and the side quest to unlock it.
Performed the initial map setup, including setting up doorbuys and zombie spawn functionality as well as created documentation detailing the process.
Performed the base economy tuning throughout the map and created the spreadsheet and formulas that were then used and referenced throughout rest of the Black Ops 6 project.
See Liberty Falls Details
Details
As a part of designing and scripting traps on the first map of Black Ops 6, I also designed the trap system language including color-coding the interactions with traps with active color-blind friendly considerations.
In Liberty Falls, I designed the two traps you will find in the map and scripted the Aetherella trap:
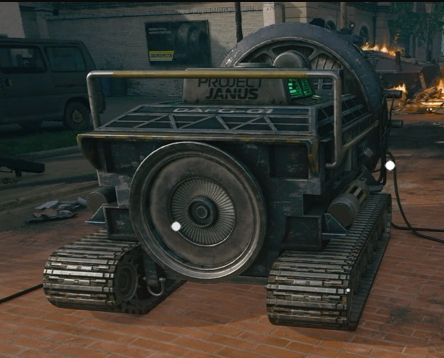
The Dark Aether Field Generator is a generator which produces areas of aetheric damage around the emitters branching form the main generator.
Dark Aether Field Generator (DAFG)
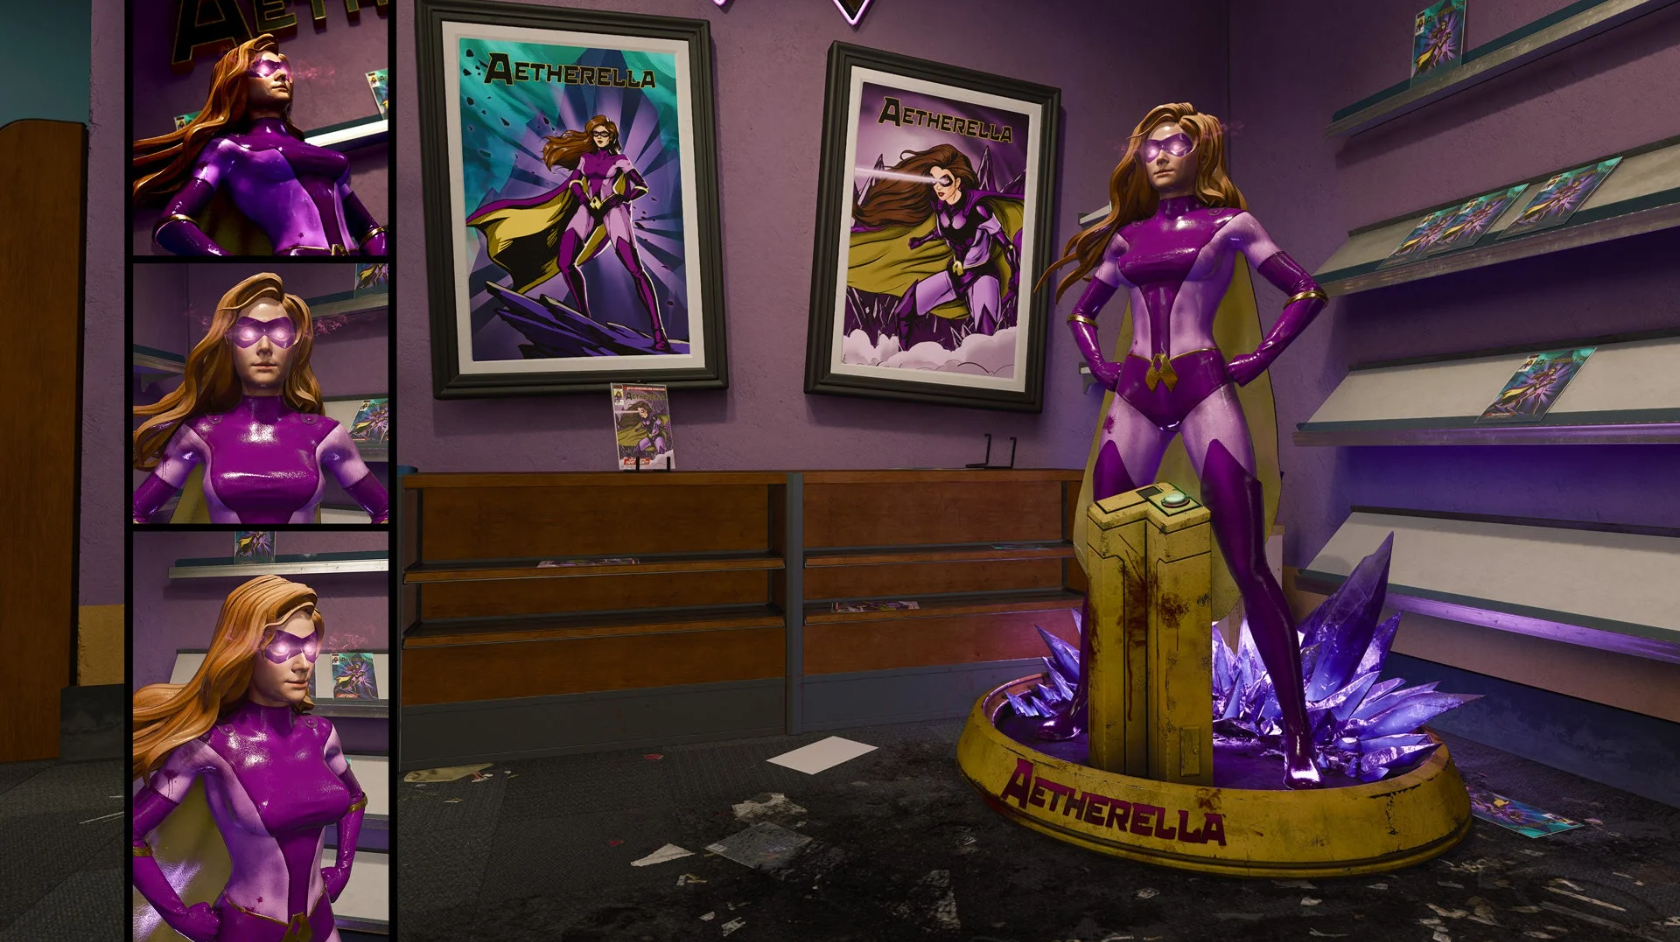
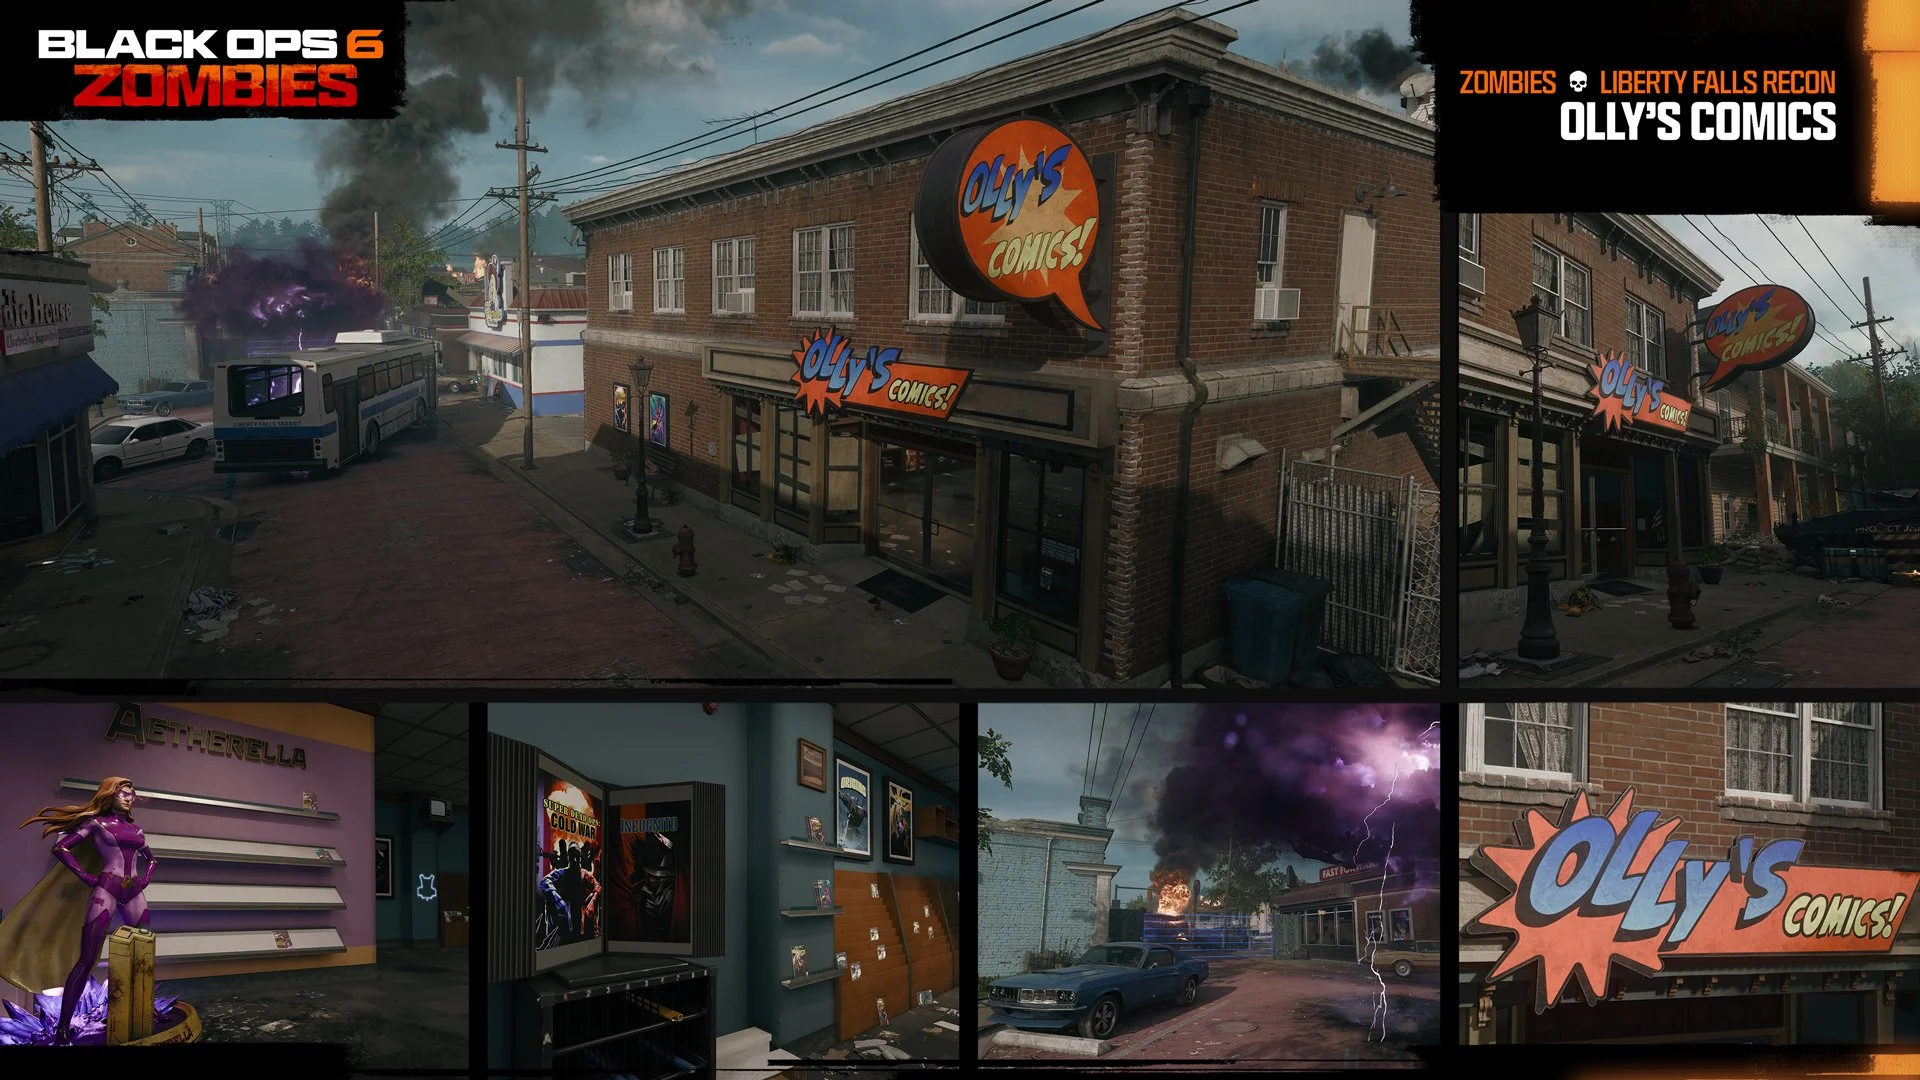
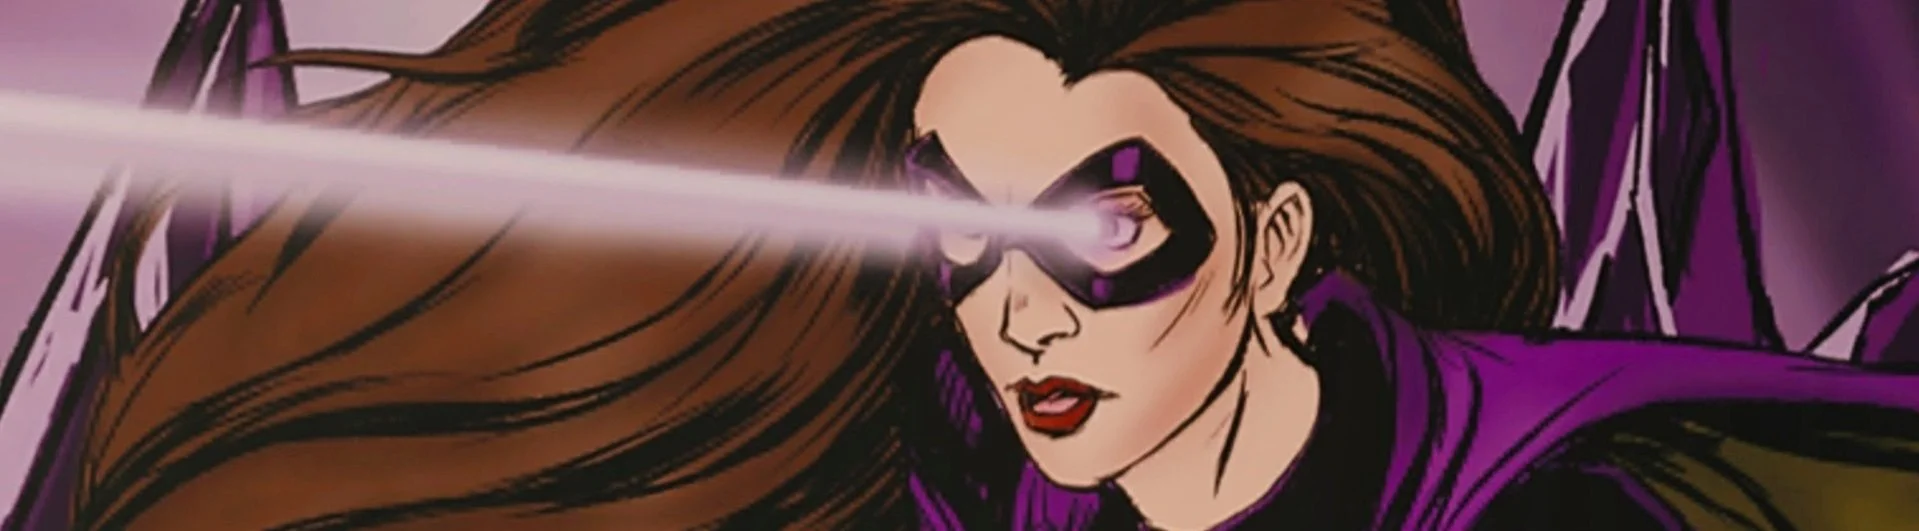
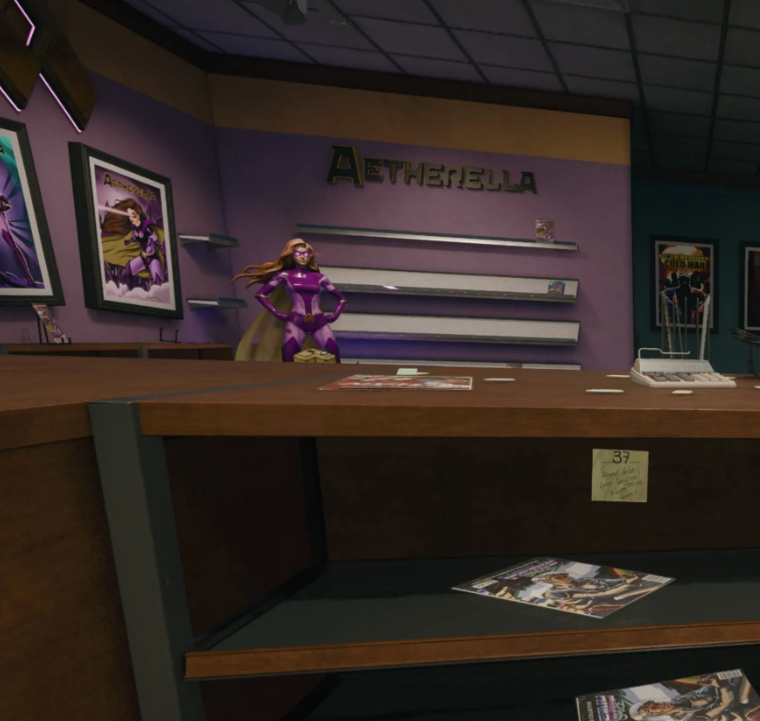
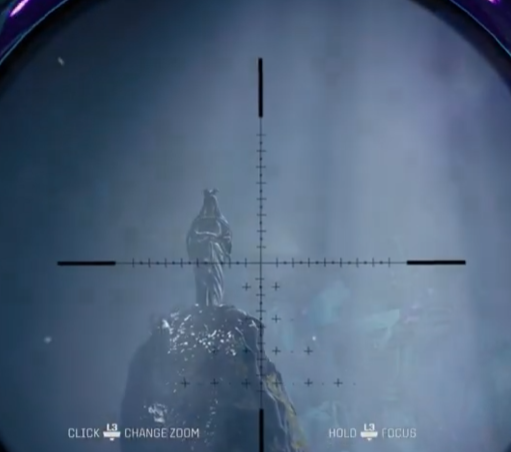
Aetherella is a powerful anti-hero featuring in their own comic book series within the Liberty Falls world. This life-size figure in the comic shop can be utilized as a trap that shoots lasers from its eyes!
Aetherella
Economy Tuning
I designed and tuned the initial passes at economy tuning for Liberty Falls and in doing so also created the format and formulas which were applied to the rest of the maps throughout the game’s development.
Map Setup
I designed and implemented the door-buys and the spawning set up for the zombies in Liberty Falls.
Along with this, I created documentation for the door-buy and spawning set-up systems to allow for easier implementation and onboarding in future maps and projects.
I also designed the Liberty Falls Bank Vault including the quest to unlock it
This feature allows players to use a variety of keys dropped from their fallen foes to receive surprise rewards throughout their match! To unlock the bank vault players must find the combination code around the map that a crew of attempted bank robbers have cracked for us.
Hide Liberty Falls Details

Launch Map: Terminus
Quest Design
Narrative Design
Combat Design
Skillsets Applied
Overview
During the development of Terminus I…
Designed the quest to unlock pack-a-punch and power the island facility
Designed the Main Quest with heavy narrative design
Designed a mini-boss fight from intro-cinematic to end cutscene
See Terminus Details

In Terminus, I designed two of the three storyline quests: the Pack-A-Punch Quest and the Main Quest
Details
Pack-A-Punch Quest
This quest requires players to activate 3 local power sources before allowing them to reach the Pack-A-Punch machine.
In order to activate one of the local power sources, players must start up an Aetherium Maturation Pod Generator to grow the crystal inside the AMP Generator into a bio-galvanic aetheric organism. This organism’s naturally electricity has been utilized by the scientists stationed on Terminus Island for power!
Once all 3 local power sources are online, players can then dive into the waters at the bottom of the Bio Lab to resurface the Inclinator, which got submerged during the initial outbreak chaos.
After players ride the Inclinator up out of the water, they are now able to use the Pack-A-Punch machine that resides upon the Inclinator (be careful - the Pack-A-Punch will move up and down with the Inclinator)!
Main Quest
This quest focuses on the following main story points:
Rescue Maya’s brother Nathan
Find Peck’s Inversion Warheads
Escape Terminus Island
Once the players have obtained the map’s Wonder Weapon (the Beamsmaher) they are able to complete this main quest. There are a variety of steps utilizing the map’s unique location and history as well as including our operator’s backstories.
The video above will walk you through the gameplay. The videos below, however, will walk you through the story.
Main Quest Story Beats
Players need to work on saving Maya’s beloved brother Nathan while Peck gathers his data. Nathan is locked away in a containment unit in the Bio Lab. Players can find a 3 digit code around the map to release him
Once he is released, poor Maya is faced with a tragedy: during his time in the Terminus labs, Nathan had been being experimented upon by Janus scientists and has been turned into an Amalgam. With only part of himself still intact, his insatiable hunger drives him to try and kill our team. Maya must now fight the brother she came to save in his new form.
If players use the Maya operator, they will receive unique voice lines where Nathan tries to connect and plead with his sister, his humanity being strangled out by insatiable hunger. At the end of the battle, Maya ends Nathan’s life to spare him from the cruel fate has had been given. She swears revenge upon everyone who had a part in Nathan’s torment, including the French Syndicate that sold her brother out.
Our map’s antagonist, the evil scientist Dr. Modi finally reveals herself. After completing a few tasks around the map, Dr. Modi drives her submarine up to the main island to tell off the team. Seeing the opportunity for revenge, Patient 13, a previous employee of Modi’s who had been turned into a tentacle monster, crushed her submarine and dragged it to the bottom of the ocean. Unfortunately, Patient 13 wasn’t considering the warheads Modi had attached to her submarine. The power of the warheads combined with the aetheric experimentation, turned Patient 13 into a violent and giant monster that the team has to fight in order to escape the island for good.
Now ready to escape, S.A.M. gives the team their next objective and they’re off!
Hide Terminus Details
V
Season 1.5:
Citadelle des Morts
Quest Design
Narrative Design
Combat Design
Environment Design
Cinematic Design
Level Design
Skillsets Applied:
Overview:
During the development of Citadelle des Morts I…
Designed the secret quest that allow players to reach the conclusion of Maya’s vengeance story
Designed the original gameplay space for this quest encounter
Designed a custom combat sequence to highlight the map’s new AI
Designed a pitch for the quest’s end scene cinematic
Designed narrative for the quest’s gameplay space and AI encounter
See Citadelle des Morts Details
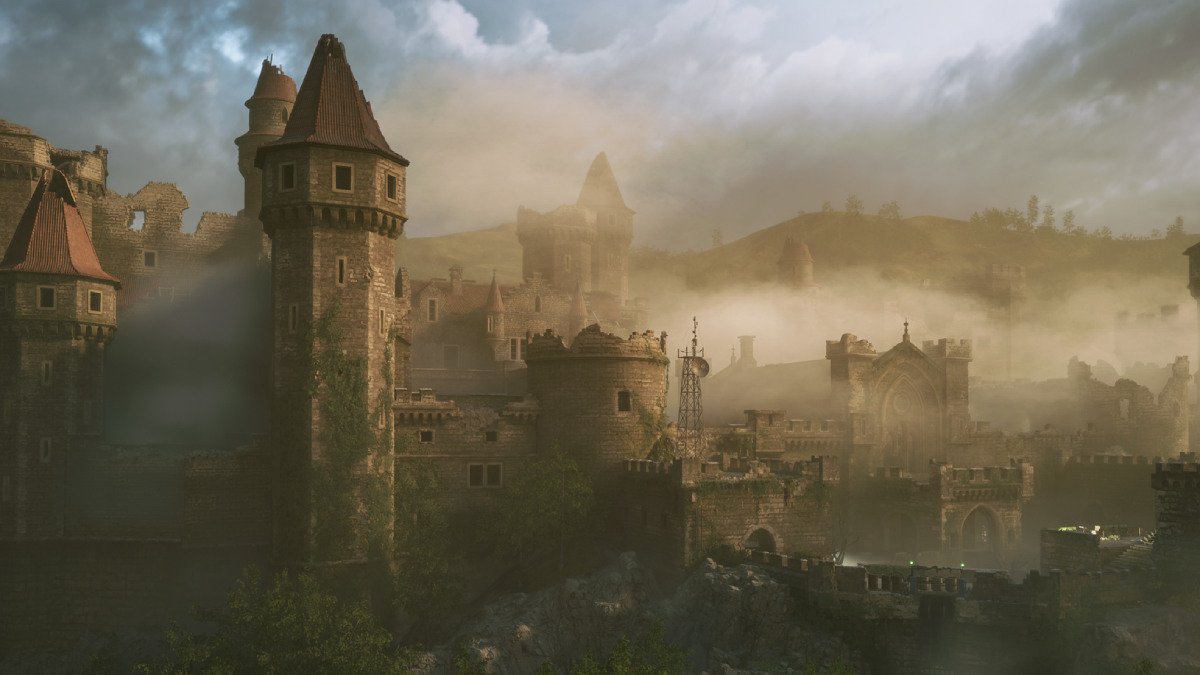
In our Season 1.5 zombies map Citadelle des Morts I was in charge of designing a secret quest which provided an ending to Maya’s hunt for vengeance in Black Ops 6.
In this secret quest, players hear Franco (the man who betrayed Maya’s brother and sent him to be experimented upon) hiding somewhere in the castle and frantically reaching out on a radio for one of his crew members to save him.
Maya takes this opportunity to trick Franco into opening the door to his location and makes her way into the encounter to make Franco pay.
After fighting her way through creepy Vermin and Franco’s old mate Laurent in his new Doppelghast form, Maya takes a final descent down to Franco’s hideout.
Franco, thinking his crewmate was coming rescue him, sees Maya and immediately locks himself back in his hideout. A cutscene then begins showing Maya blowing in the door and having a final confrontation with Franco.
To create this experience, I worked with Level Design to create an original play space for this encounter, including custom zombie spawning and narratively-tied details.
I championed the cinematic vision of Maya entering a creepy cramped corridor and coming face-to-face with Vermin crawling out from dark holes in the walls and ceilings - showcasing the AI’s unique movement.
I then took a beat to highlight our new AI type debuting with this map - the Doppelghast - and give a stage for the AI to display it’s dodging technique while providing an intensely engaging encounter for the player.
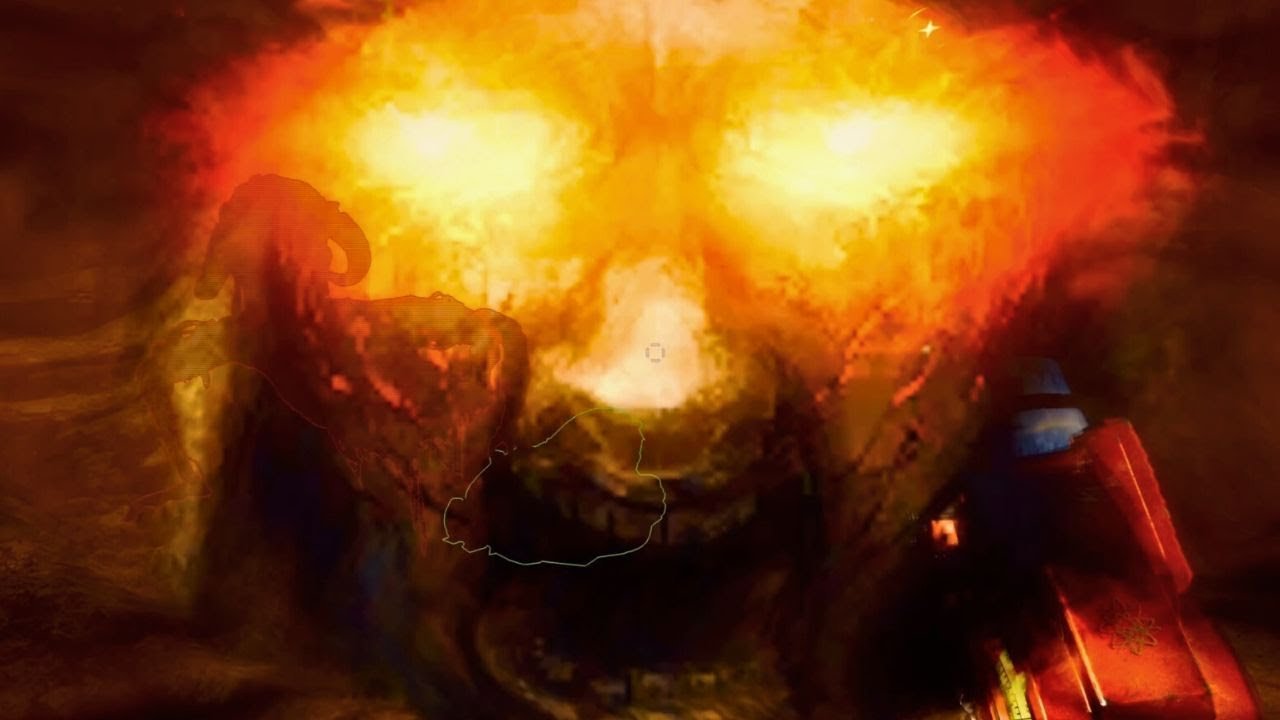
I then worked with the Creative team to bring the vision of the cutscene to life in which Maya and Franco’s characters are both clearly displayed. Franco - cowering and attempting to hide from his poor choices and Maya showing creatively violent solutions to her problems.
My favorite part of pitching the design of this cutscene was the image of Maya blowing open the door and standing in the doorway of fire - staring down at Franco.
Hide Citadelle des Morts Details
Season 02: The Tomb
Skillsets Applied:
Quest Design
Combat Design and Tuning
Economy Tuning
Scripting
Live Service
Onboarding Assistant
External Partnership Collaboration
UI Implementation
Save/Load Functionality
VO Implementation
Script and Entity Optimization
Obfuscation and Leak Prevention
Accessibility in Design Advocacy
Overview
During the development of The Tomb I…
Assisted in on-boarding our Vancouver team to the engine and tools used for this project
Worked closely with our Shanghai Activison partner studio on the development of this map from concept to live-service
Implemented unique UI functionality alongside the UI engineers for original player encounters
Scripted and de-bugged save/load functionality for the Wonder Weapon Quest, Pack-a-punch quest, and a trap feature
Analyzed entity optimization of all features in this map and performed script optimization on target features
Implemented leak prevention tactics such as hashing and obfuscation
Worked as live service on this map upon its release
Designed the quest to unlock Pack-a-punch
Designed the quest to build the Wonder Weapon
Designed the Main Quest
Championed accessibility within the quest designs on this map
Scripted the Wonder Weapon quest
Designed, Scripted and Tuned custom combat sequences
Performed Economy Tuning with special focus on combat and quest rewards
Implemented VO

See The Tomb Details

Details
I was the sole in-house designer on our Season 2 map The Tomb for the majority of its development and worked closely with our partner studio Shanghai Activision during this time period. As such, I wore quite a few hats on rotation for the development of this Season 2 content.
I first began on this map as a quest designer.
Quest Design
I designed all of the base mainline story quests (Pack-a-punch -> Wonder Weapon -> Main Quest) with the provided goal of making an engaging, repeatable and simple questline for our casual player demographic .
Pack-a-punch Quest Design:
To hit the goal of a friendly casual map for players - unlocking the pack-a-punch is a straight-forward and simple process.
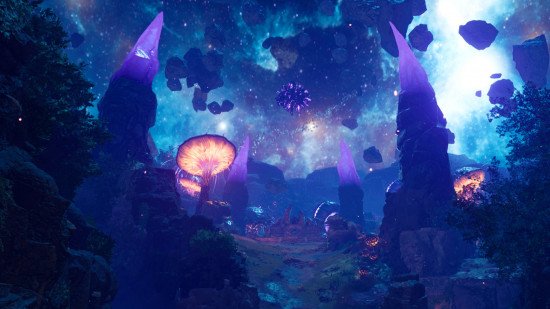
Players must reach the back of the creepy underground area in The Tomb where they will find a pedestal and a “Door to Nowhere”.
Upon interacting with this pedestal, the amulet that the zombies team canonically received in Citadelle de Morts (the most recently released Black Ops 6 zombies map at the point of The Tomb’s release) will float above the pedestal and be utilized as a key to unlock the portals to the Dark Aether Nexus. Once players travel through a portal to the Dark Aether Nexus, they will find the Pack-a-punch machine!
Activating these portals also restored the flow of aetheric energy from the Dark Aether Nexus throughout the rest of the map, opening features for player use.
Wonder Weapon Quest:
In this quest, players must retrieve an ancient artifact by killing a special enemy, reveal and solve two puzzles by utilizing unique map features, survive the combat trials, and then defend the Wonder Weapon and charge it with the souls of the zombies trying to attack it to complete the reformation.
Step 1: Get Archibald’s Monocle
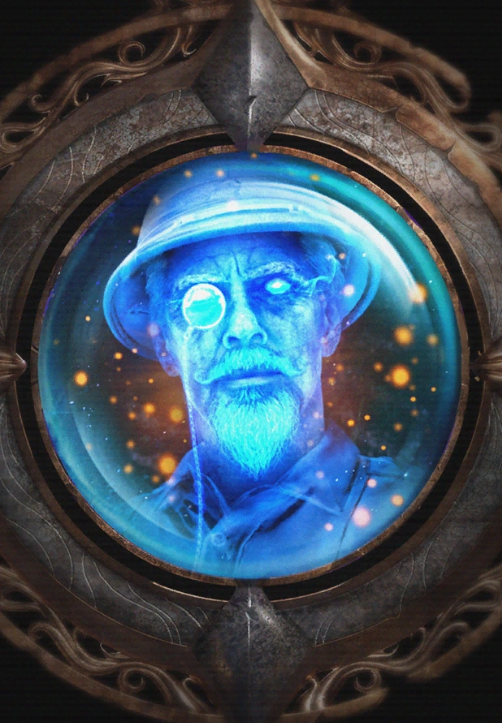
This quest provides some narrative background on the fabled character Sir Archibald Fotherington-Smythe and (spoiler) his untimely demise.
Sir Archibald (and his monocle) was eaten by a Shock Mimic while exploring The Tomb. Players must kill the aggressive mimic and retrieve the monocle from it.
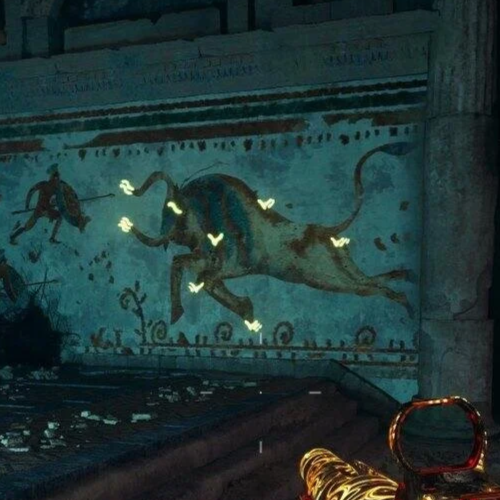
Step 2: Reveal the Constellation Puzzles

We utilized the map’s Aetheric Lantern feature to hide puzzles players needed to solve! When the correct lantern in the area was lit, it would reveal the puzzle!
But only if they had already retrieved Sir Archibald’s monocle.
To give some player agency, I had the design reveal the symbols if the player picked up the monocle after the correct lantern was already set up. That way players could plan ahead if they wanted.
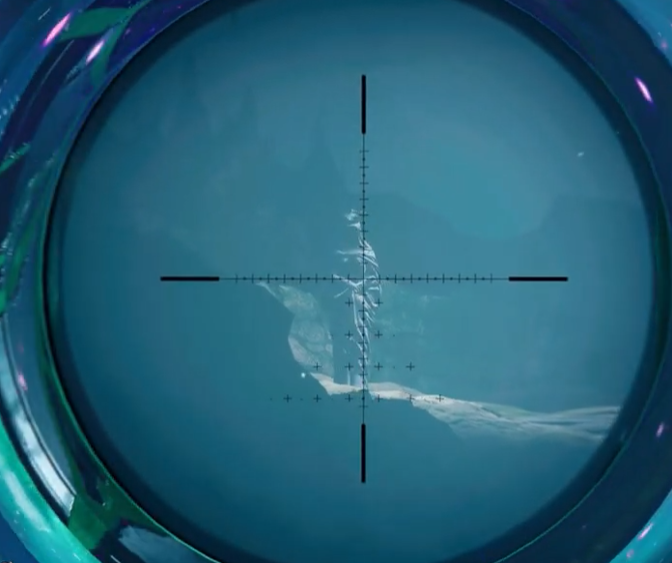
Step 3: Solve the Constellation Puzzles
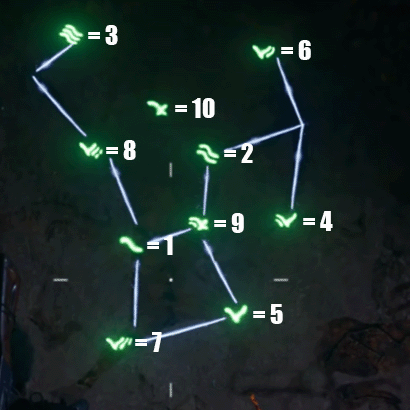
These puzzles involve connecting symbols in a specific order to form a constellation
If you shoot an incorrect symbol three times, the lantern will be set off and the puzzle will disappear. You then need to bring the lanterns around and try again. This is seen in the above clip.
Above is a clip from RoflWaffles’ EE Hunt stream when they first reach the win state of a puzzle.
You can see the whole hunt video here
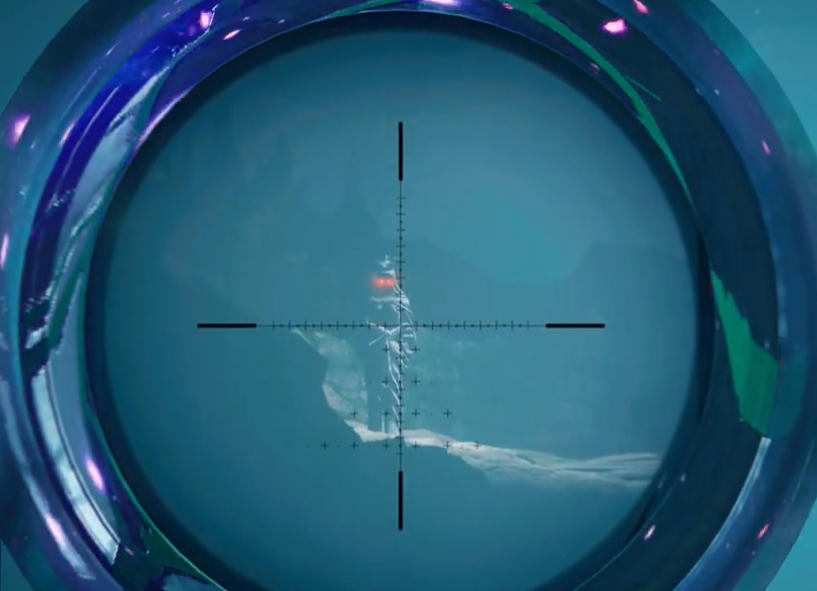
Step 3.5: Follow the Energy
The aetheric energy from the completion of a puzzle condenses into a flying orb that leads players to a location within the constellation’s area. A giant portal forms where the orb stops (near one of the Aetheric Lanterns in the area) and arcs of light shoot out from it onto the ground around the portal.
Above is a gif from RoflWaffles’ EE Hunt stream when they first complete a constellation puzzle.
You can see the whole hunt video here
Step 4: Survive the Combat
SUPRISE!
If you followed the orb you are now surrounded by zombies spawning all around you from the ground portals. Players must now defeat 5 waves of zombies (each more difficult than the last). After each wave is defeated, the Aetheric Lantern at the orb portal location will be set off, and create a fiery Area of Denial for the rest of the challenge. The area is now in a semi-lockdown. Players are able to enter and exit the area but if all players leave the area, the combat step you are on will repeat from the last uncompleted portal and all of the fire will remain active until the challenge is completed! The combat will restart as a player enters the space.
Step 5: Complete the Second Constellation Sequence
When the final portal is completed, it will disappear and the Wonder Weapon part related to that puzzle will appear. Players must complete the other puzzle and combat sequence which follows the same flow - though one puzzle and combat sequence is slightly more challenging than the other
Step 6: Complete the Final Defend
When players have both pieces of the Wonder Weapon, they must travel into the Dark Aether Nexus and place the two parts they have gathered onto the Energizing Plinth in the center of the Nexus area.
When this happens, the two pieces will float towards each other and the final defend event will begin! Zombies will spawn from portals existing on either side of the Energizing Plinth in waves. Players must kill the specially charged zombies (indicated by a purple VFX) that are going after the Wonder Weapon. As these zombies are killed, the portals begin to shrink and the energy from these portals begin to flow through the grooves of the Energizing Plinth to the Wonder Weapon. Players must kill a certain number of these zombies to fully close the portal and provide the portals’ energy to the Wonder Weapon to reform and recharge it.
Once that occurs, the Wonder Weapon is restored and players are able to pick it up, upgrade it and then progress to the Main Quest!
Main Quest:
In this quest, players must complete the Trials of Evolution and reform the bridge to the final arena.
Each trial is themed after a zombie type that is part of the evolutionary chain in Black Ops 6. The trials start with the weakest/beginning form of the evolution and ends with the strongest/final evolution form. This evolution chain is a Black Ops 6 original feature and so I had aimed to design this quest around highlighting this new mechanic! :)
When a player completes a trial, the story-relevant Amulet is filled with temporary energy from the combat that forms a shield around the player carrying it. Players must bring it back to the ritual monoliths in the Nexus to continue the trials. If the player carrying the energy is hit too many times, the energy is depleted and players must go back to retrieve it again.
A fun twist to give the players an intense moment is that I intentionally shut down the portal closest to the Nexus while the energy is in transit. Evil or engaging? … Why not both? >:)
Trial of Vermin
The first evolutionary form is the Vermin. Though they are small “popcorn” enemies, their strength comes in numbers.
This trial was designed to cause the players to face overwhelming waves of Vermin flowing from around the dig site into the bowl combat area of this trial. The trial (and sequential trials) was tuned with new players in mind to meet the goal of creating a casual/new player-friendly experience.
Trial of Parasites
The second evolutionary form is the Parasite. These agile winged enemies cause major grievance with their projectile attacks.
In this trial, players must take note of which Parasites are formed carrying ritual energy. They must kill these Parasites within range of the trial and then carry the energy back to the Amulet. If the players sacrifice enough of this energy to the Amulet within the ritual’s time frame, they succeed and can now carry the Amulet and its energy back to the Nexus.
Trial of Doppelghasts
The third evolutionary form is the Doppelghast. This incredibly fast and dangerous enemy is a can’t miss component of Black Ops 6 zombies.
One of my favorite features of this AI is the toxic spikes it shoots out at players. These spikes cause the player to be slowed, which matched with the Doppelghasts’ incredibly movement speed becomes quite a terrifying combination. To showcase this unique ability, I designed this trial to have the ritual altar choose random points on the floor to spawn spike shooters while the trial is active. Players must kill the Doppelghasts spawned for this trial within the trial area while avoiding the spawned areas of spikes on the ground. It’s quite a hectic challenge that definitely had me panic yelling at my monitor a few times!
Trial of Amalgam
The fourth and final evolutionary form is the Amalgam. This amalgamation (heh) of body parts and various zombies is infamous for its tanky factor - especially because it can absorb other nearby zombies to regenerate its own health! (yuck!)
This ability was highlighted in the final trial by having the amalgam spawned for this ritual host a shield around itself that it tethered to various zombies around the play space. Players must first get rid of the zombies being used to power the shield and then deal damage to the Amalgam before more zombies are chosen to replenish the shield!
With all trials complete, players can now enter the Boss Arena and attempt to obtain the Sentinnel Artifact
Jump Scare Side Quest:
For this map, our design deck had called out wanting to have a JumpScare. However, as we came closer to closing down to map, I noticed we still didn’t have any jumpscare design specced out.
Not wanting to miss out on the chance to have a creepy jump scare in this underground cavern map, I set to work!
As our team was already pretty stacked up in sprint tasks, it was important for me to keep this design very low-scope. I first studied our narrative team’s lore for the map to find inspiration that would fit with the map’s story. Once I found that inspiration, I began sifting through our asset bank to find something spooky to re-use so we wouldn’t have to ask for any additional assets.
Lucky for me we happened to have a handful of VERY creepy looking statues in the depot!
I grabbed those assets and began crafting my idea. I wanted to give the EE hunters a little bit of a chase for this and love using elements already existing in the game… just in a new way.
Here were my main thoughts:
A) EE Hunters and Lore Lovers are bound to explore every INCH of the map - I need to think of a place outside the box (or navmesh, so to speak)
B) COD Zombie players are used to jumpscares being one-shot, timed events. To add some spook, I wanted to shake this expectation up.
C) There’s nothing like the good ol’ fear of the unkown to keep people on edge - I wanted to use this to my advantage.
That led me to the first pitch I gave to my map lead:
Place one of these super creepy statues out in the vista of the map - we have a lot of really cool cave scenes but nothing out there to look for.
If people stare at it, it will turn around and flash ANGRY RED EYES at the player and disappear

When the player turns around, the statue will spawn DIRECTLY in front of the player for a moment with a scary soiund and then disappear. No other player will be able to see the statue when it appears in front of the player.
Then, after a few rounds, the statue will re-appear in one of the vista locations - ready to go again.
I was given the go-ahead to pitch this to our stakeholders. They were super interested in the idea and basically said - if we’re gonna do a jumpscare, lets give it some additional oomph and some asset scope. Some SUSPENSE.
The design was handed off to my fellow designer Shriram and he added on one of my favorite components of this design!
Shri went (in my paraphrasing): Hear me out - what if, to add intruige and suspense, we change the jumpscare trigger from immediately when you turn around to when you least expect it: interacting with in-game items like salvage! Until the jumpscare gets triggered (which is by random chance each interaction), you hear spooky whispering with no context - keeping you on your toes in antici-
ALSO
What if I told you that you can PASS the jumpscare to your team members? If you haven’t triggered the jump scare yet but have the whispers, just run up to your buddy and knife them a few times real fast and the jump scare passes to them! They get the whispers and random chance to trigger the jump scare while you get off scott-free!
AND
Since we got some asset wiggle room, the art team is making a super scary splash screen to play when you get jump scared!!
That led us to the design we have now and honestly one of my favorite things to do while playtesting was pass off the jumpscare - it got quite a few yelps!
Then, after chatting about it with our awesome challenge designer Shea, the team made passing off the jumpscare one of the secret Dark Ops challenges!
It was actually one of the last challenges to be completed and rewarded you with the cool Maya calling card below.

Feel free to checkout this video to learn more about the jump scare and see it in action!
-pation
-
It’s a callback to the trailing antici- from above!
Also a reference to Rocky Horror Picture Show
And a dazzling example of my superb sense of humor
Hide The Tomb Details
V
Season 05: Reckoning
Skillsets Applied:
Quest Design
Combat Design and Tuning
Economy Tuning
Scripting
AI Design
Narrative Design
External Partnership Collaboration
UI Implementation
Save/Load Functionality
VO Implementation
Script and Entity Optimization
Obfuscation and Leak Prevention
Overview
During the development of Reckoning I…
Designed the narrative of the 3 quests I owned in collaboration with the Creative team to fit the goal of wrapping up some character storylines
Implemented VO
Worked with our Shanghai Activison partner studio on the development of this map
Implemented UI functionality a
Scripted and de-bugged save/load functionality for the Wonder Weapon Quest
Implemented leak prevention tactics such as hashing and obfuscation
Designed the quest to obtain the Wonder Weapon
Designed the branching quests to upgrade the Wonder Weapon
Designed the Uber Klaus HVT enemy
Designed, Scripted and Tuned the Forsaken fight
Designed, Scripted and Tuned custom combat sequences
Scripted the Wonder Weapon quest
Performed Economy Tuning with special focus on combat and quest rewards
See Reckoning Details
V
This section is under construction - please stay tuned for updates or reach out to learn more! :)
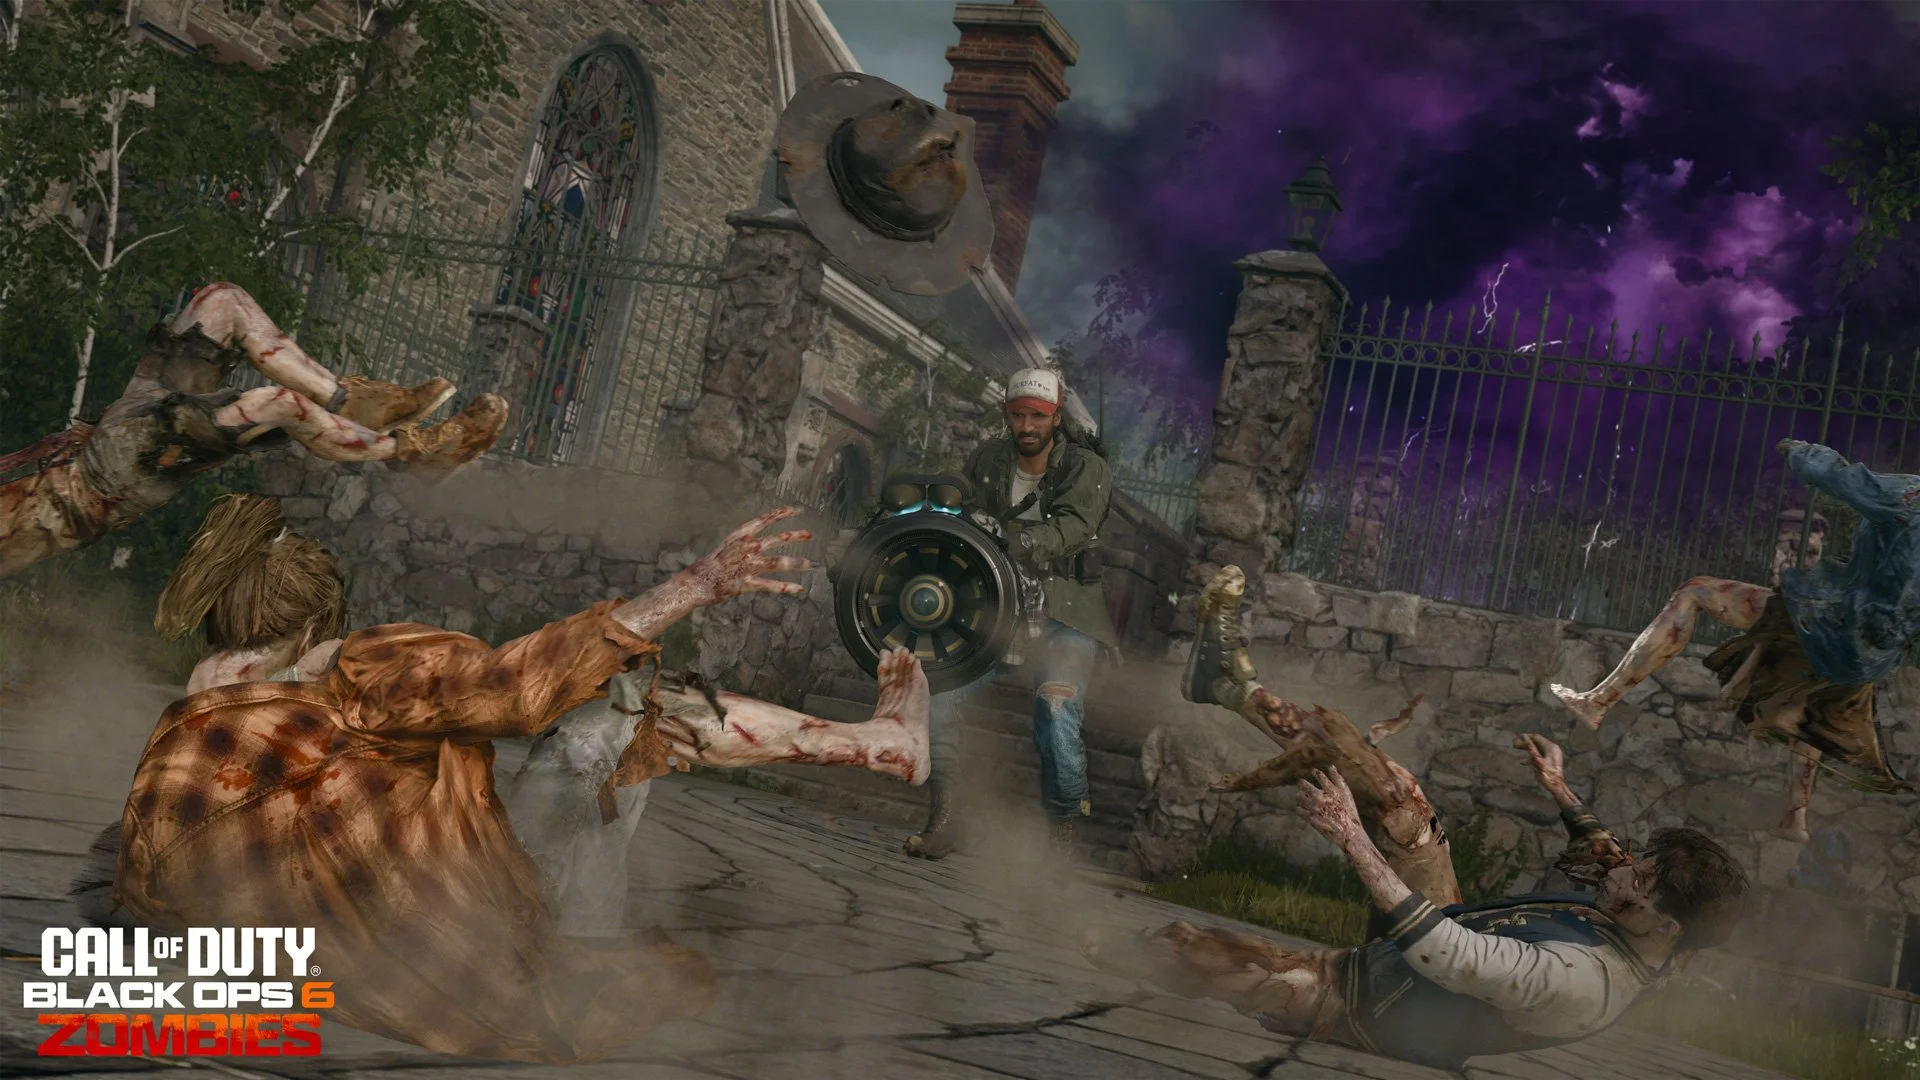
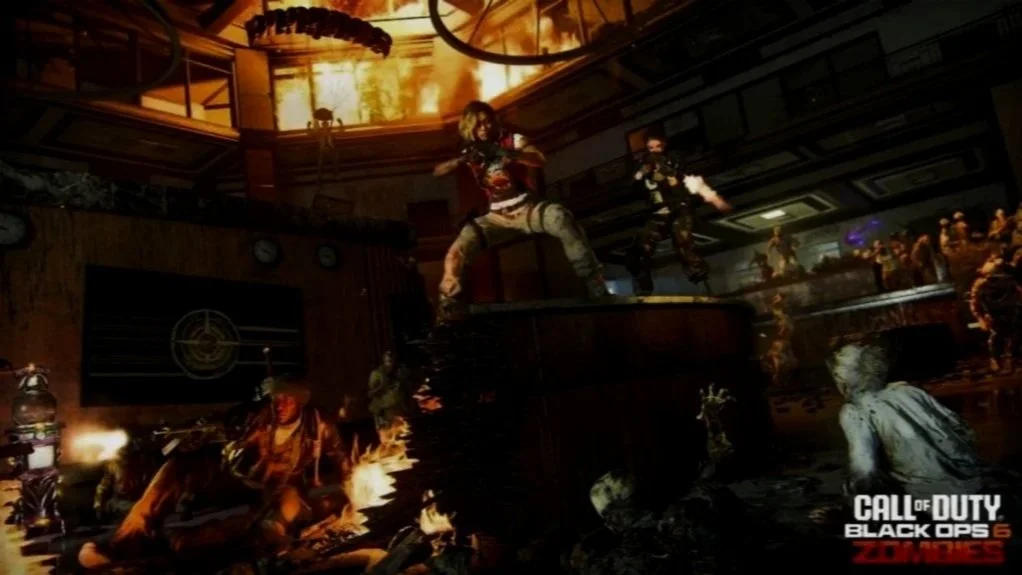
CodeNamePizza fighting The Forsaken for the first time!
Check out the full EE hunt with CodeNamePizza here: https://www.youtube.com/live/D1ZKkHyjFag?si=1dHjvIDZLxNpAEA7
This webpage is still in development.
More content coming soon!